|
Current version: v2026.112 released: Apr 10, 2026 |
|
|
|
Current version: v2026.112 released: Apr 10, 2026 |
|
|
Qimage Ultimate
innovations in digital imaging:
|
|
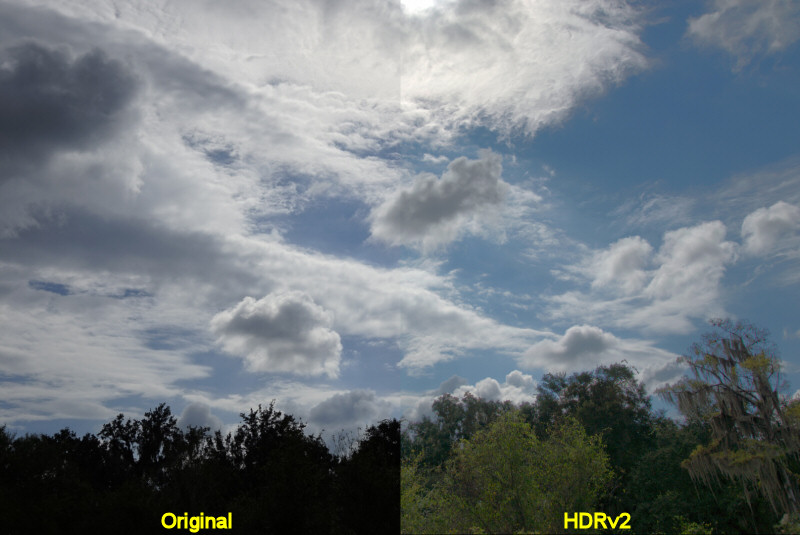
Qimage Ultimate - Single Raw HDR First, a word about image editing in Qimage Qimage (Lite, Pro, Studio, and Ultimate) allow you to apply any and all image editing functions such as sharpening, brightness, contrast, fill light, levels, curves, tone targeting, and much more by association. Instead of editing your original files and having to save edited copies to clutter your hard drive, Qimage simply associates a small parameter file with the image so that each time the image is accessed (by Qimage), the edits are applied. This also means that you can reopen and re-edit the photos at any time and your previous edits can be reviewed, changed, or removed! This "associative filtering" method was first invented and introduced by ddisoftware in the late 1990's as a way to modify images without having to resave them. NEW (October 30, 2015): Introducing HDR v2 in Qimage Ultimate 2016.126 We have improved the HDR function in Qimage Ultimate 2016.126 to produce clean, artifact-free results over a wide range of settings. The process remains as simple as before. For example, in a landscape shot with trees and sky, first draw your exposure box around the brightest clouds in the sky to recover as many highlights as possible. Then use fill light to bring out details in the shadows (trees, buildings, etc.). Since fill light is a smooth brightening curve, some detail will be lost in the sky/clouds. To bring back highlight detail in the sky and clouds and make your HDR image, drag the HDRv2 slider to the right to maximize detail in the sky and clouds and stop when your changes reach the skyline. HDR v2 allows precise control over highlight detail without producing ghosting or other artifacts where landscape meets sky.
Single Raw HDR in Qimage Ultimate Explained High Dynamic Range or "HDR" photos allow you to display a much greater dynamic range in your photos than can be displayed (on your monitor) or printed (on your printer) using standard developing techniques. Tools exist that allow you to take multiple exposures (by bracketing for example) and then "meld" the exposures together to get better light-to-dark range in your photos. We at ddisoftware have found, however, that many times photographers are going through the hassle of trying to take and combine multiple exposures when in many cases, a single raw contains enough dynamic range to do an even better job without trying to mix and match different exposures! Single raw HDR is not a new concept. Just do a web search and you'll see that many people are creating HDR photos from a single raw exposure. While you can't expect a lot of range from a point and shoot camera, even a reasonably cheap dSLR (generally any camera with a sensor larger than the small point-and-shoot camera sensors) can capture enough range to make an HDR photo. To create an HDR photo, all you need to do is create a photo that compresses the dynamic range so that it exceeds the range of your output device (typically a monitor or printer). Even the cheapest dSLR cameras can capture 1-2 stops more range than your monitor can display and 2-3 stops more than you can print, so HDR from a single raw photo is certainly possible. In some cases of extreme lighting or contrast, you may still need multiple exposures and other software to make an acceptable HDR photo, but can you do it with just one? In many cases the answer is YES, and if so, Qimage Ultimate can make great HDR photos from just one raw exposure! With the release of Qimage Ultimate v2010.122, you can now easily create HDR photos from one raw exposure! The process for shooting and developing single raw HDR photos in Qimage Ultimate is simple:
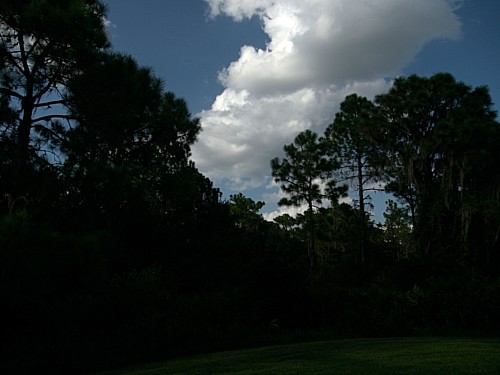
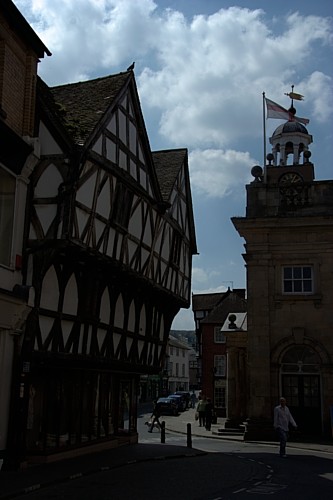
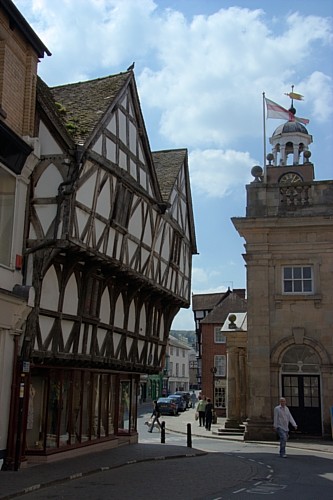
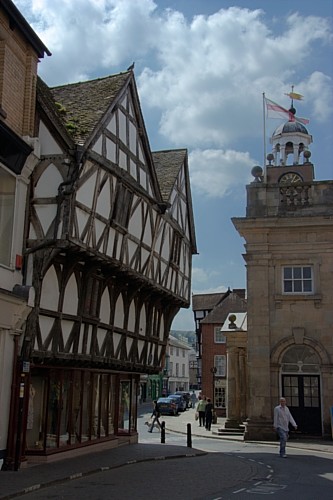
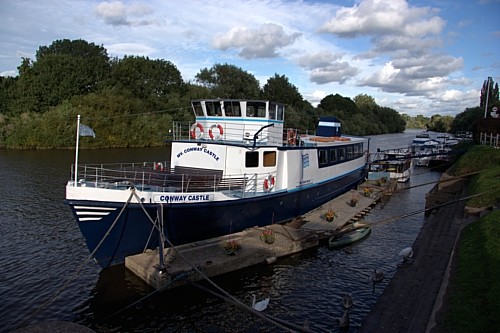
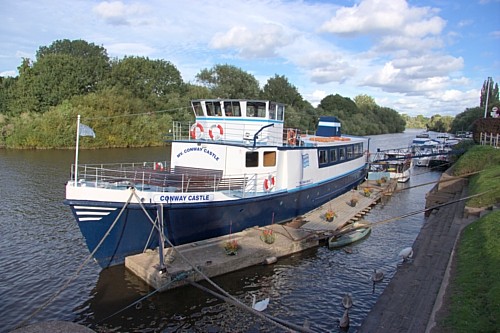
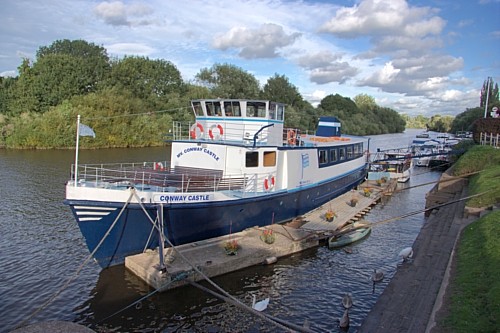
That's it! You'll be amazed at the HDR photos you can create from a single raw exposure using only two sliders! Here are a few examples: All of the examples below were created simply by dragging the "fill light" and "HDR" sliders in the raw refine tool on a single raw exposure. No making selections, no creating complex layers, and no modifying the original image! Figure 1
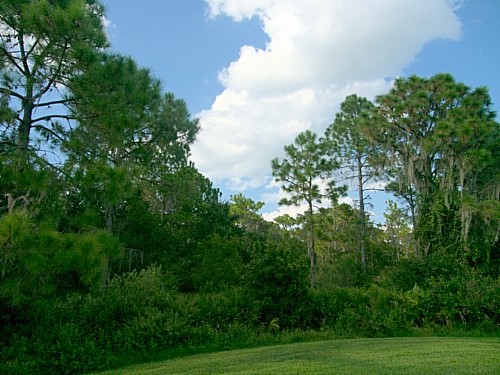
Figure 2
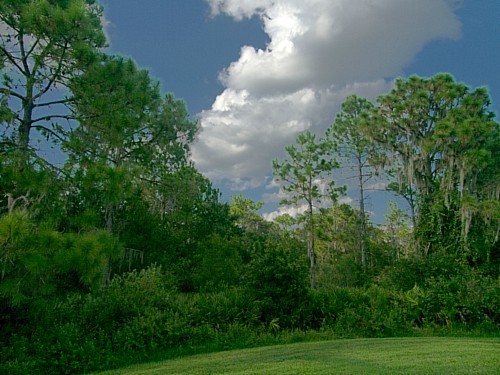
Figure 3
|
||||||||||||||||||||||||||||||
| All Products | Copyright 1998 - 2025 ddisoftware, Inc. | Contact |